So you’ve jumped on the air fryer bandwagon, and who could blame you? These nifty gadgets have changed the game for whipping up crispy delights without all that oil. But let’s face it, after a few rounds of homemade fries or chicken wings, your trusty air fryer is looking a bit grimy.
Cleaning your air fryer isn’t just about keeping it looking good; it’s crucial for maintaining its performance and ensuring your food tastes as delicious as intended. Don’t worry though—it’s not rocket science! With some simple steps and regular maintenance, you’ll keep your machine in tip-top shape.
First things first: unplug that bad boy before you do anything else. Safety always comes first, right? Then get ready to give your air fryer the spa treatment it deserves—minus the cucumber slices over the eyes, of course. Let’s dive into how to make your appliance shine like new again!
Why clean your air fryer?
Let’s talk about keeping that nifty air fryer of yours in tip-top shape. You might be wondering why you should bother cleaning it after every use, right? Well, for starters, leftover grease and food particles can really start to build up over time. And trust me, you don’t want that! Not only does it get pretty gross, but it can also affect the taste of those crispy treats you love so much.
Now think about this: all that gunk stuck inside isn’t just unsightly—it’s a playground for bacteria. Yikes! Regular cleaning ensures you’re not giving these unwanted guests a free pass to crash your next meal. Plus, who wants their kitchen smelling like last week’s fish sticks? A clean air fryer means no lingering odors.
And here’s something else—keeping your air fryer clean actually helps extend its life. That’s right; maintenance is key if you want to keep on enjoying those deliciously fried goodies without the guilt. When bits of food and grease accumulate, they can cause your machine to work harder than it needs to, which over time can wear out parts faster.
Safety first! Did you know that built-up grease could potentially become a fire hazard? It sounds dramatic because it is. Cleaning out your air fryer reduces the risk of starting an accidental grease fire in your kitchen. So yeah, definitely worth taking a few minutes to wipe down and scrub out!
Lastly, let’s not forget efficiency. A clean air fryer works better and cooks more evenly. Ever noticed how leftovers sometimes come out soggy or not as crisp when reheated? Keeping everything spick-and-span means consistent cooking results every single time.
So grab that non-abrasive sponge and some dish soap; your air fryer—and future self—will thank you for it!
Supplies needed for cleaning
Before you dive into scrubbing your air fryer, let’s make sure you’ve got all the right tools on deck. You wouldn’t paint a masterpiece without your brushes, right? So here’s what you’ll need to get that air fryer looking brand spanking new:
- Soft-bristle brush or an old toothbrush: These little guys are perfect for getting into those nooks and crannies where grease likes to hide.
- Microfiber cloths or paper towels: They’re like the trusty sidekick of cleaning supplies—great for wiping away grime and polishing surfaces until they shine.
- Dish soap: Opt for a gentle one; it’ll cut through the grease without being too harsh on your air fryer’s non-stick surface.
- Baking soda: This is your secret weapon against stubborn stains. It’s like magic dust for tough spots!
- Vinegar (white or apple cider): When mixed with water, vinegar becomes an eco-friendly cleaner that can help disinfect and deodorize.
Here’s how these supplies team up in action:
- Mix dish soap with warm water to create a sudsy solution ideal for general cleaning.
- Combine baking soda with a bit of water to form a paste that tackles the hard-to-clean areas.
- Create a 50/50 mix of vinegar and water as a natural alternative to commercial cleaners when you want to avoid strong chemicals.
Remember, while using these supplies, always be gentle! Your air fryer has feelings… well, sort of. The non-stick coating needs TLC so it can keep doing its job without getting scratched up.
Now that you’ve got your arsenal ready, roll up those sleeves—it’s time to transform your greasy gadget back into the shiny champion of convenience cooking it was meant to be!
Step 1: Unplug and cool down the air fryer
Before you dive into cleaning your trusty air fryer, safety comes first. You’ve got to unplug it from the power source. This might seem like a no-brainer, but hey, better safe than sorry! Now give it some time to chill—literally. Those components can get hotter than a summer day in Death Valley.
Let’s talk timing. How long should you wait? Well, patience is key here; around 30 minutes should do the trick. That’ll ensure everything’s cooled down enough so you won’t burn your fingers when you start scrubbing away.
While waiting for it to cool off, why not grab a cup of coffee or catch up on that episode you missed last night? Time flies when you’re having fun—or binge-watching!
Once things have settled down temperature-wise, check if any parts are removable. Baskets and trays often come out easily and they’re usually where most of the gunk accumulates. Taking these pieces out will make your cleaning mission way more effective.
Remember this simple rule: hot surfaces plus immediate washing equals a recipe for disaster (or at least potential warping). So take it easy, let that machine rest before giving it the spa treatment it deserves!
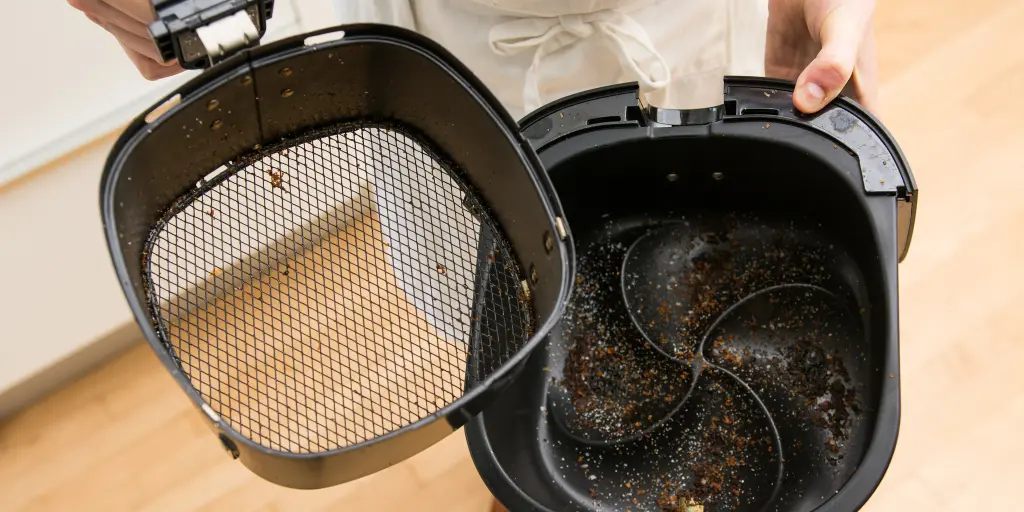
Step 2: Remove the basket and tray
Alright, let’s dive into the nitty-gritty of getting that air fryer squeaky clean. First things first, you’ll want to unplug your appliance because safety always comes first. Now, it’s time to take out the basket and tray – these are typically where all the magic happens (and by magic, I mean crispy deliciousness).
Most air fryers have a removable basket or drawer that easily slides out. If yours has a button or latch mechanism for release, go ahead and press it to lift out the basket. You might find some crumbs or leftover bits hanging around at the bottom; don’t worry, we’re gonna tackle those soon.
Here’s what you should do with these parts:
- Shake off any loose food particles over the trash can.
- Check if they’re cool enough to handle—you don’t wanna singe your fingertips!
- Inspect them for any stuck-on food; sometimes stuff just loves clinging on for dear life.
Now you’ve got these components out in the open, give ’em a good look-over. Are there greasy spots? Burnt pieces from last week’s sweet potato fries? It’s totally normal—air fryers work hard! But remember this: while most baskets and trays are dishwasher safe (hallelujah!), double-check your model’s manual because nobody wants a melted mess on their hands.
If washing by hand is the way to go—or maybe you prefer it—warm soapy water will be your best friend here. Use a non-abrasive sponge or brush to gently scrub away any stubborn areas. Rinse thoroughly after because no one likes soapy residue with their next batch of onion rings.
And voilà! With those parts removed and prepped for cleaning, you’re well on your way to an air fryer that looks almost as good as new. Just make sure everything is completely dry before reassembling because moisture and electronics are not BFFs.
Step 3: Pre-treat stubborn stains
Alright, let’s tackle those pesky stains that seem to laugh in the face of your regular cleaning routine. You know the ones – they cling on for dear life and make you wonder if they’ve signed a lease to stay in your air fryer forever.
First things first, mix up your magic potion. Grab some baking soda and water to whip up a paste with a toothpaste-like consistency. Why baking soda? It’s gentle yet abrasive enough to scrub away food residue without scratching surfaces. Plus, it’s a champ at absorbing odors – bonus points!
Now slather that paste directly onto the stubborn spots. Let it sit there like it owns the place for about 20 minutes or so. This gives it time to break down the gunk and makes your job easier when you go back with a sponge or brush.
After the timer dings (or after you’ve scrolled through social media for what feels like five minutes but is actually twenty), get scrubbing! Use a soft-bristled brush or an old toothbrush for nooks and crannies where gunk likes to hide out. Circular motions work best here; think wax-on, wax-off vibes from “The Karate Kid.”
Once you’ve given those stains what-for, wipe everything clean with a damp cloth or paper towel. If any stain dares remain, repeat the process until it gets the message that it’s not welcome anymore.
And remember, prevention is key! Regularly wiping down your air fryer after use can help prevent these squatters from moving in again. Keep up with maintenance and those deep cleans won’t feel quite as daunting next time around.
Step 4: Clean the basket, tray, and other removable parts
Alrighty, let’s dive into the nitty-gritty of cleaning those bits and pieces that actually hold your food – we’re talking about the basket, tray, and any other removable parts. First things first, you’ll want to unplug your air fryer (safety first!) and make sure it’s cool enough to handle.
Now for the fun part! Take out the basket and tray from your air fryer. These are usually coated with a non-stick surface which is great for cooking but can be sensitive to harsh scrubbing. So here’s what you do:
- Fill up your sink or a large container with warm soapy water.
- Let these parts soak for about 10 minutes; this will loosen any stubborn gunk or leftover food particles.
- Use a soft sponge or brush to gently wipe away residue. Avoid metal scouring pads as they can scratch off that precious non-stick coating.
If there are some tough spots giving you grief, baking soda is like magic dust in these scenarios. Sprinkle some on the problem area, add a bit of water to form a paste, and give it a gentle scrub. Afterward, rinse everything thoroughly because no one wants soapy-tasting fries next time around!
Once all parts are squeaky clean just shake off excess water and let them air dry completely before reassembling your trusty air fryer. And voilà! You’re ready for another round of guilt-free fried deliciousness without unwanted leftovers from last week’s meal tagging along.
Step 5: Clean the interior and exterior of the air fryer
Alright, you’ve tackled the basket and pan, but don’t forget about the main event—the air fryer itself. It’s time to give the interior and exterior a good scrub down. Here’s how you can make your air fryer sparkle like it just came out of the box.
First things first, unplug that bad boy for safety reasons. You definitely don’t want any unexpected sizzle while you’re cleaning. Let it cool off completely before you dive in; patience is key here.
- Interior: Grab a damp cloth or sponge with a bit of dish soap on it.
- Gently wipe down the inside where grease may have splattered.
- If there’s stubborn residue, use a soft-bristled brush to gently coax it away—no harsh scraping needed!
- Make sure to get into all those nooks and crannies where oil loves to hide.
Now let’s talk about drying because moisture’s not exactly an electronic device’s best friend. After wiping everything clean:
- Dry every inch thoroughly with a microfiber cloth or paper towel.
- Leave the unit open for a while to air dry completely before plugging back in.
Moving on to the outside:
- Use a slightly soapy sponge or cloth to wipe down the exterior.
- For fingerprints or smudges on stainless steel models, using a vinegar solution (equal parts water and vinegar) works wonders.
Remember, never immerse your air fryer in water! The electrical components would throw quite the fit if they took an unexpected bath.
Finally, check out these quick tips for keeping your appliance in tip-top shape between deep cleans:
- Wipe spills as soon as they happen
- Avoid aerosol non-stick sprays—they can create buildup over time
- Regularly emptying any crumbs from the bottom extends its life
With this routine, your trusty kitchen sidekick will be ready for whatever recipe comes next!
Step 6: Wipe down and reassemble the air fryer
Alright, you’ve conquered the cleaning of individual parts. Now it’s time to bring your trusty air fryer back together. But hold on! Before you start piecing it all back like a puzzle, let’s make sure everything is nice and dry.
Grab a clean cloth or paper towel for this next part. You’re going to give the entire interior a good wipe-down. Make sure to hit every nook and cranny where oil or food particles might be hiding out. If there are any stubborn spots that didn’t come off during soaking, a bit of baking soda mixed with water can work wonders—just apply it gently with a sponge or brush.
- Interior: Use a damp cloth to wipe inside the cooking chamber.
- Heating element: Be gentle around this area; use a soft brush if needed.
- Exterior: A simple wipe should do, but for smudges, a little vinegar on your rag will get that stainless steel shining.
Once everything looks spotless, check again because moisture can be sneaky. It loves hanging out in hidden areas and could cause problems later if not fully eradicated. So double-check those corners!
Time to put it all back together now:
- Start by sliding the basket and pan into place.
- Next up, insert any racks or additional compartments your model may have.
- Finally, ensure the exterior is completely dry before plugging it back in.
There you go—you’ve got yourself an air fryer that looks as good as new! Remember these steps after each use to keep flavors fresh and extend the life of your appliance. Plus, who doesn’t love cooking with something that sparkles?
Step 7: Maintain a regular cleaning schedule
Keeping your air fryer in tip-top shape isn’t just about the occasional deep clean. It’s all about consistency, folks! Regular maintenance can prevent build-up of food residue and grease that could affect the taste of your fries or chicken wings – nobody wants that.
Here’s the deal: after each use, give your air fryer basket a quick wash with hot soapy water. This will stop any leftover bits from sticking around like unwanted guests at a party. If you’re using it multiple times a week, aim to do a more thorough clean every couple of uses. Trust me, future-you will be grateful for past-you’s diligence when there’s no mystery smell coming from the kitchen!
Now let’s talk scheduling because life gets busy and it’s easy to forget these things. Set a reminder on your phone or write it down on the calendar hanging on the fridge door. Maybe every Sunday night is “Air Fryer Spa Day” – whatever works best for you.
- After Every Use: Quick basket wash
- Multiple Uses Per Week: Thorough clean bi-weekly
- Reminder Tip: Set alarms or mark calendars
Remember those hard-to-reach spots? They need love too! Once a month, take an extra few minutes to check if anything has slipped through the cracks (literally). A soft brush or an old toothbrush can work wonders in getting out any sneaky crumbs hiding in corners.
And here’s something cool: some users swear by lining their air fryer basket with parchment paper or aluminum foil to catch drips and crumbs before they become problems. Just make sure not to cover up important vents and always follow manufacturer guidelines.
By keeping up with these simple steps, you’ll ensure that your trusty air frying sidekick lives a long and crispy life—ready to whip up tasty treats whenever hunger strikes!
Conclusion
Alright, you’ve made it to the end of your air fryer cleaning journey. Let’s wrap things up with a quick recap and some final tips to keep in mind.
First off, remember that regular maintenance is key. You don’t want old food bits hanging around—they’re not just gross but can also affect how well your air fryer works. So give it a good clean after each use.
Here are the essentials:
- Unplug before you start—safety first!
- Use soft sponges or cloths to avoid scratching.
- Stay away from harsh chemicals; mild soap and water will do the trick.
- Check if parts are dishwasher safe for an easy clean-up option.
And hey, don’t forget about the heating element! A gentle brush-off every now and then keeps it working efficiently.
Now let’s talk frequency:
| Part | Cleaning Frequency |
|---|---|
| Basket/Tray | After every use |
| Pan | After every use |
| Interior | Once a week |
| Heating Element | Every few uses |
Keeping this schedule helps extend the life of your air fryer so you can keep enjoying those crispy delights without any hiccups.
Finally, deep cleans aren’t daily chores but think of them as seasonal refreshes for your appliance. They’ll help tackle any stubborn grease and ensure everything runs smoothly.
So there you have it—you’re all set to maintain that air fryer like a pro. Happy frying, and enjoy all those delicious treats minus the mess!